Let's do another tutorial. I am going to show you how to create an Airplane silhouette with illustrator.
We'll be working with basic shapes, some nice transformation tools and Gradient colors. Also we will slightly touch the subject of perspective drawing.
But before we begin - let me tell you something. I'm a female. Never in my life have I drawn an airplane. Ever. I did try to do it several months ago, but it was a complete fiasco. Today, after releasing the Independence day card, I feel a need to share the knowledge.
I wanted to create a simple plain without any details, a silhouette level plane. First I did some basic pencil sketch - it always helps me to understand the structure of the form better - and then started working.
So....
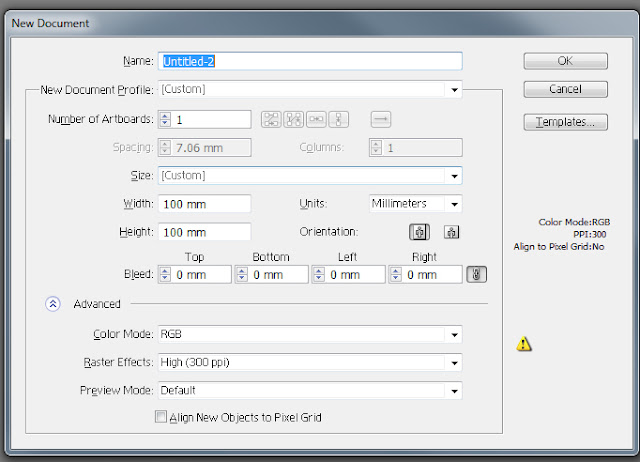
1. Open a New document (Cltr + N) 100mm*100mm in Illustrator.

2. Choose an Ellipse tool |(L) and create a narrow ellipse (click the artboard and Drag the mouse down).
3. Choose a rectangle tool (M) and draw a narrow rectangle in the head part of the ellipse. This will make the base of the airplane wing.
4. Now let's shape the wing itself. Choose the upper right point of the rectangle (A + choose) and use the keyboard's Down arrow to place it a bit lower. Choose the bottom right point and raise it up a bit.
5. Create two smaller ellipses (L; click + drag down); these will be the bombers. Choose them and bring backward (Choose + Cltr + Shift + [ ).
6. Group the wing and the bombers (Choose + right click + Group).
7. Right click the wing group and go to Transform + Reflect. Choose Vertical and Copy. Place the second wing on the opposite side of the plane, and Ungroup all (right click + Ungroup).
8. Copy and drag two wings to the tail section (choose + Alt + Drag). Make them smaller (Choose + Shift + Scale).
9. Create another smaller rectangle (M; click + drag) in the bottom section. Move some points to shape a tail (A; use keyboard arrows). Place it somewhere in the bottom right part of the plane (as shown).
10. Choose the body of the plane and apply a Gradient color to it. Go to gradient panel, double click one of it's handles and pick a color from the Swatches menu. I chose light blue for one and a bit darker shade for the other. Press G and apply a gradient vertically, up to bottom, dark to light.
11. Choose all (A) and delete Stroke color(/).
12. Adjust the gradients so the plane looks like a smooth structure. Move all the right wings to the back (Cltr + Shift + [ ).
13. Choose the whole plane and rotate it left a bit.
This is it. The plane is ready.
Tip of the post: Always make a sketch with your pencil on paper before you start working with illustrator - it will help yo to understand the structure of the object better.
Have a great day,
Dalia


No comments:
Post a Comment