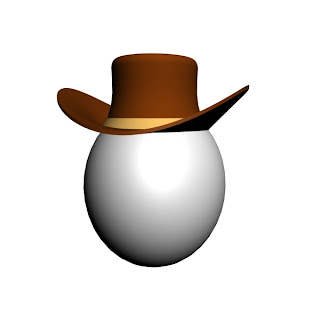
In this tutorial you will learn how to create a cool brown cowboy hat.
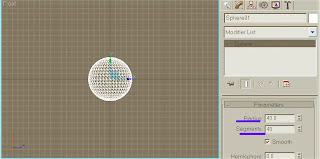
1. Create a simple sphere: Radius-40, Segments - 40. It will represent a head for our Cowboy Hat. Make it White.
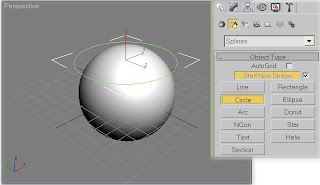
2. Then create a circle to match the upper third of the sphere.

3. In modifier menu change the parameters of the circle to: Rendering sides - 20, Interpolation Steps – 20 to make the hat smooth and its Radius - 30. Make it Brown.
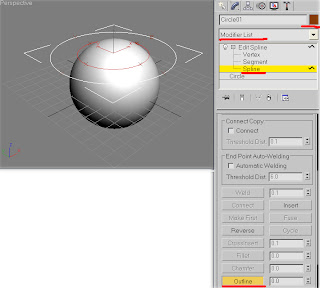 4. While Circle still chosen go to Modifier list – Edit Spline. Choose Spline sub-object. Scroll down to Geometry menu and choose Outline to create another, bigger outer circle. To do so, choose outline, go to the Top View and hover over a circle. When the cross appears drag it inside the smaller circle. You should get this result.
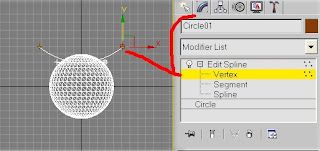
5. Now – the most important part: Go to front view. Choose the bigger circle and via Modify panel pick its left and right vertexes and pull them up a little bit.
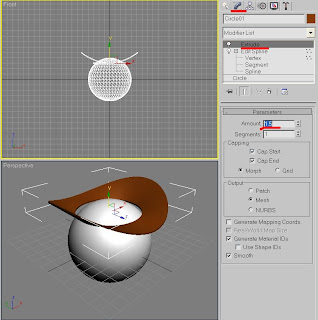
6. Go to modifier list – choose Extrude and increase its Amount to 1.5.
Well, the difficult part is over.

7. Create a ChamferCyl: Radius 30, height – 50, fillet 4, Height segs 5, Fillet sides 14, Sides – 36, Cap segs 2 and make it Brown.
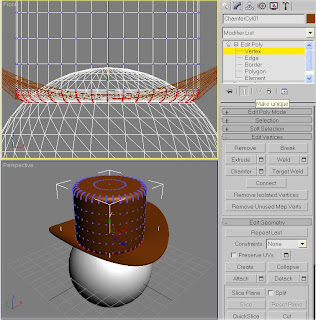
8. Convert to Edit Poly and Delete the bottom vertexes (8). Place it above the bottom place of the hat.
Now we'll start deforming the top of this hat.
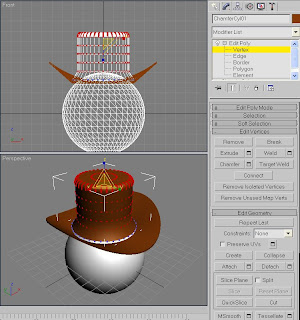
9. Choose all but last row of vertexes on the front view. Hold the CLTR key and choose Top View.
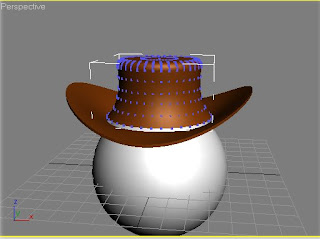
Keep scaling the vertexes lines until you like what you see. Use cowboy hat pictures to get close to the desired model. Mine looks like this.
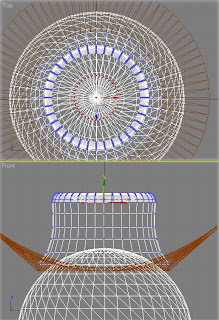
10. Now in the Top View choose the upper vertexes and on the front view push it down.
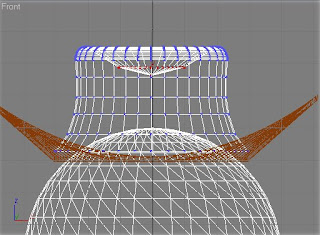
11. Repeat with the Top Central vertex.
12. For the last touch – squeeze everything a little beat and put everything on its place.
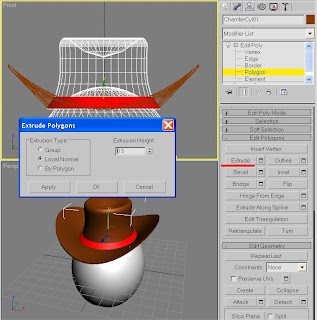
13. Don’t forget to color one stripe different color than the hat. To do so choose bottom polygons of the top part of the hat. Extrude :0.5.
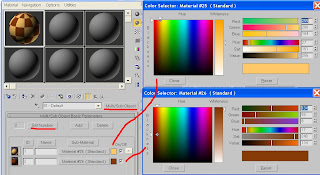
14. Now press M on your keyboard, choose an empty slot and change the parameters as shown on the image.
15. Now choose the top of the hat and apply materials to it.
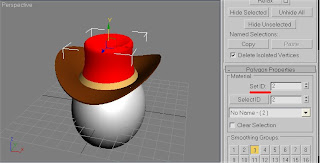
16. If the colors are not applied as you wished, go to polygon properties and change the Material set IDs. (19)
17. Press F8 if you want to change the Background color. For final render press F9.

Well, that’s it. The hat is ready. If you have any additional question regarding this tutorial, don't hesitate to ask.