August 30, 2013

Drawspace Lesson F13: How to properly draw and shade a mug.

Hi all,

Today, with the help of Lesson F13 of the Drawspace art program we'll learn how to properly draw a simple mug. As simple object as it seems - it has its catches. I was never able to properly draw a mug. My difficulty was always with its handle as I couldn't do it proportionally as it should be. The inside and the outside curve frustrated me.

In the beginning if the lesson it is suggested to use the mug one has in the kitchen. But I'll allow myself to be a chicken and copy first. As a "punishment" I'll do not one but two differently shaped mugs from my kitchen.

This is the sketch. As you can see there's no "first step" sketch, because I simply got deep into the process.


And these are the "challenges".


I hate the shading, as always, but I'm ok with the form, so I guess, it's not that bad.

I hope you found this post useful.

Have a great day,
Dalia

August 28, 2013

Drawspace lesson F12: how to draw a Seahorse.

Hi all,

It's time for Lesson F12 of a Drawspace art program. This time we'll learn how to draw a Seahorse. Seahorses are those tiny creatures living deep into the ocean and looking like little dragons. The first time I worked on drawing a seahorse was when designing a Diving theme wedding invitation.

This lesson is a bit different. Very little text, lots of images. There's not that much to read but just sit and copy from the given. Which I happily did.

This is the first 2H sketch, plane light lines, no details.


I actually erased is several time, since it took me some time to get the proportions right.

This is the more detailed sketch. Since, as noted in the lesson, this is not a specific species of a seahorse I allowed myself not to follow every single line, but only the main features.


This is the final version of the seahorse. Before hatching I cleaned the sketch, erased all the unnecessary lines, outlined it with a 4B pencil and hatched a bit.


As for the challenge we are requested to do a Sea-Unicorn. I asked myself what the hell is it? I mean, obviously I know what a unicorn is, but a Sea-Unicorn? After a short search I found an image of a Seahorse with a horn and I loved this idea.

So here's mine :) I based it on this photograph I found online.


After a while I looked at the outcome, and it seemed too hunchbacked. So started over.

This is the new version.


I know that the shading is poorly done, but like I said many times before - shading is not my strongest side.

Interesting fact - most of the Seahorse photos are taken from the side, there's no front image of it...

Anyways, I hope you enjoyed this lesson and my sketches.

Have a great day,
Dalia

August 26, 2013

Drawspace lesson F11: How to draw a Tulip

Hi all,

Today we'll be taking Lesson F11 of a Drawspace art program. We will learn how to draw a Tulip, which happened to be one of my favorite flowers. As far as I remember, this is the first Drawspace lesson dedicated to a flower drawing. Most of it, at least up till now, dealt with cartoon images, basic exercises and outdoor scenes. The nice thing is that I have some experience in flower drawing. The blogging year 2012 was fully dedicated to this subject. I was learning how to draw flowers, one flower per month. Tulip was the flower of February and I collected 5 tutorials that showed how to draw a Tulip. For some reason this lesson is not on my list, but I got to it now. 

This is the first sketch. It was done with an HB pencil, nothing out of ordinary. Based on triangles, which were later turned into smooth lines of Tulips petals. 


This is another step. I erased all the helping lines to make the sketch ready for shading. 


This is the final phase. The tulip is ready.


Obviously, I could make the shading a bit smoother and a bit darker than it appears here, but I didn't.

As for the drawing challenge - this time there's actually a challenge in the lesson and it's simple and obvious. One should draw another tulip from another angle. So I chose this photo I found online

This is the first step - rough 2H lines without any erasing.


This is the final, shaded result.


It's nice to know that this time it was way easier than last year.

I hope you enjoyed this lesson and found it useful.

Have a great day, 
Dalia

August 24, 2013

Drawspace lesson F10: How to draw and hatch a landscape scene - 2.

Hi all,

Today we'll be taking Lesson F10 of a Drawspace art program. In this lesson the subject is a landscape hatching. Back view, mid view and front view are in order, as well as different pencils and light sources.

As usual, I first read the lesson through to understand what is expected of me and only then I start working.

The process was pretty simple.
I created the scene, using helping dots and lines, as usual.


I did some hatching and after giving it a second look I've realized that the scene is too bright. I sharpened my pencils and added some more values.

This is the final result.


Here I must say that this sketch is a personal success; I'm not sure I could do it last year.

Since there was no challenge I decided to do another sketch using a photograph I took a while ago.


I started with a 3H pencil just to map the main objects.


And then I started to shade it. It didn't take me long time to finish the sketch, it felt pretty easy. After finishing, I went to sleep.

When I looked at my drawing the next day I discovered this.


And I hated it.

After trying to fix it I decided to redraw the whole thing.

I made the sketch again with a 2H pencil. The first and the second hatching layer of the skies were done with 2H too.


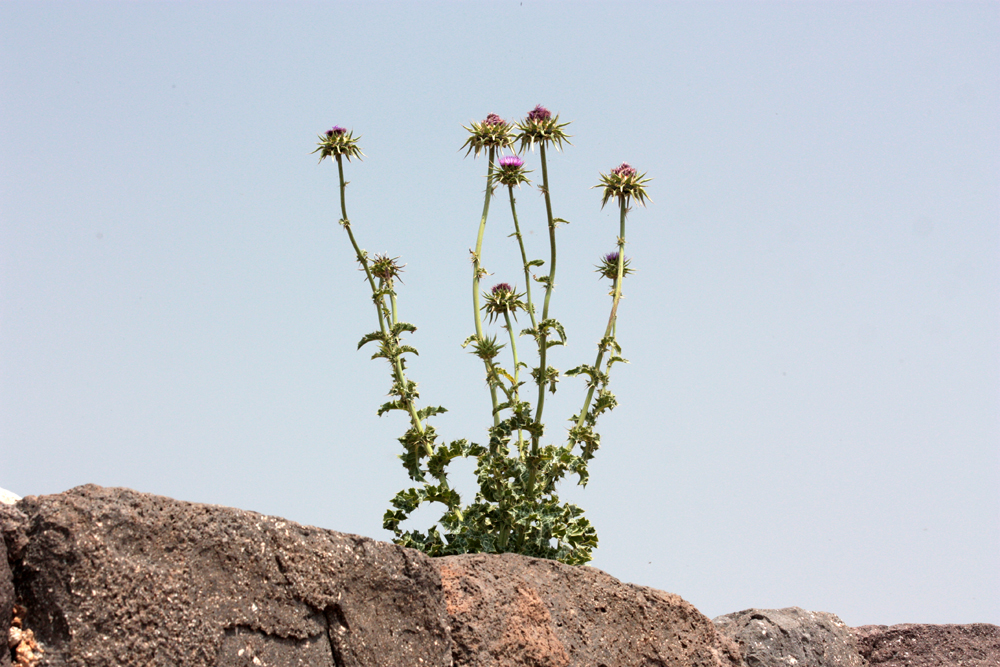
Using HB pencil I did the thorn bush.


With 2B pencil I started to map lightly all the dark patches of these rocks.

The rocks were the scariest part to do - I was wondering if Squirkling would work here.
I added some hatches, but I'm not sure it helped. It is obvious I haven't decided where is the light coming from, and how does it effects the scene.


Although it's not perfect - I'm happy with it.

Tip of the post: Have at least two pencils of each type and have them half and fully sharpened. This will add some variety to your shading.

Another Tip of the post: Never draw when sleepy. Better leave it for the next session or you'll have to redo your entire work.

Btw, this post has the biggest number of images I ever put in one post.

Have a great day,
Dalia

P.S. After finishing I had to sharpen my pencils all over again :)

August 22, 2013

Drawing habits and workflow: paper sheet with a ready made frame.

Hi all!

Today I officially open a new section of this blog: Drawing habits and workflow.
This will be the prime title of every post that has to do with, well, drawing habits and workflow. No, it's not a Tips and Tricks post that will actually be published in the end of the year, but rather a section when I will be suggesting utilization methods, DIY's and such to make the drawing workflow easier. Actually, the first post on the subject was published some time ago, where I showed how I utilized a simple Pencil box.

This one is about the paper one draws on. Usually we take a blank sheet of paper and just draw. Simple. But what happens if you need your sketch put in a frame? Not an actual wooden one but the one on the paper? Like when you do a landscape but don't want to use the whole page? Or when you need your work to be perfectly symmetrical? Obviously, you could use a ruler, but, come on, there are simpler ways....

So what do you do? You create a frame on your paper, using any software you have, be it graphic (Illustrator, Photoshop) or text processor (Word, PowerPoint) or any else you have. You place a square/rectangle on your work space. It doesn't have to be in the center of the page but it should be proportional to it.

This is mine.


I didn't place the rectangle in the center since I work with a clip board, so it would be pretty uncomfortable. Also I made the frame itself light gray and not black. That way it is visible to me and doesn't really effect the drawing itself.

And then I made 10 copies of them and put them in a see through folder. Now it's ready to be used.

I don't know yet how useful will it be, I guess, time will show.

How about you? Do you have any tip for making your workflow easier? And did you find this tip useful? Do share your experience here.

Have a great day,
Dalia

August 20, 2013

Drawspace lesson F09: graduate hatching

Hi all.

Today we'll be taking Lesson F09 of the Drawspace art program. We continue with the Shading techniques section and this time we'll be shading a hair-like figure. Light highlights are involved and loads and loads of hand movements.

The process is quite simple: you draw a light circle using a 2H pencil and then add three curved lines to it. After that you gradually beginning the shading itself: from light to dark.

This is my first sketch. The transition looks nice but you can still see the places where I switched the pencils.


I decided then to give it another try and did a second one.
After giving it a second look I smoothed it a bit with freshly sharpened pencil as suggested in the lesson and I think it really helped.


Tip of the lesson: Always smooth your shading with freshly sharpened pencil creating a short and light lines. Thanks, Brenda!

I hoped you enjoyed this post.

Have a great day,
Dalia

August 18, 2013

Drawspace Lesson F08: Circular hatching

Hello,

and welcome to Lesson F08 of a Drawspace art program.

This lesson is about circular hatching. I don't really remember what lesson was it but in one of them we were asked to create and hatch a circle. It was interesting and difficult since, I guess, a natural hand movement creates an almost straight lines. Therefore, circular lines should be practiced. So, automatically, this lesson goes to my future "Drawspace lessons to repeat" list.

The first exercise was to create some curved lines to find a natural hand movement.


After finishing reading and knowing what I'll be hatching (I always read the whole lesson before I do its tasks) I thought that maybe these lines are curved but not circle enough. So I did a second set.


In both sets I checked (V) the direction that felt more natural to me.

And this is the actual exercise. It's a potato-like shape that needs to be shaded.


The first step was to draw a shape and create some curved helping lines for the future shading. It is actually a great tip, since usually a curved shading looses its correct path at some point. And since you do long lines anyway, these helping lines won't be visible. Unless, of course, you press hard on your pencil.

This is the shaded form. The pencils used are HB and 2B.


I was really tempted to rotate my paper sheet so that the shading would be more comfortable but then I thought, why not? Just for this one. On the other hand I do realise that there will be moments that I I'll have to deal with larger scale drawings so I better get used to work without rotating anything but my hand/wrist.

I also made some mistake in shading here so the outcome is not as smooth as it's supposed to be. That's why I decided to do another sketch.


As you can see, visually the first sketch is smoother and nicer looking than the second. The big difference is that in first one I allowed myself to rotate my paper and in the other - I didn't.

Tip of the post: When shading a circular shape always use helping lines to keep the right shading direction.
Another Tip of the Post: When circle hatching, keep our hand movement back and forth, without raising your pencil. It will make the hatching more fluent and create a soother surface.

Have a great day,
Dalia

August 16, 2013

Drawspace lesson F07: Pencil shading using different methods.

Hi all,

and welcome to Lesson F07 of a Drawspace art program. This is a seventh lesson dealing with pencil shading techniques. In this one we'll be working with a Cone and a Circle and using not one but several methods to shade our objects.

The task is to draw a cone, a pompon on its peak and give it a face/character. And to shade it, obviously.


This is the outcome. I must say, I really liked this task. It didn't require any realistic drawing, but a character development using some basic geometrical figures. That's why I did two more sketches just for the fun of it.


Basically I just twisted the shape a bit and changed the expression. I guess if I added several more lines in the cheek area I would get a grim fat lady.

After examining the drawing I decided to go a little bit wilder and made this one.


A bit snobbish, a bit all over itself, but I love it. The twist is bigger, the pompon is different the eyelashes are larger.
I get wild!!!

I really enjoyed this lesson and I hope you did too.

Have a great day,
Dalia

August 14, 2013

Drawspace lesson F06: Making your first outdoor sketch

Hello,

And welcome to Lesson F06 of a Drawspace art program. In this lesson we'll be drawing an outdoor scene. Obviously, as a challenge I intend to go outside and to draw an actual outdoor scene. And, by the way, half way through reading I added this lesson to my future "Drawspace lessons to repeat" list.

But first - let's exercise.
The process is simple enough - first you map some main objectson your paper, then you add details. Front view, center view, back view. Same with shading.

That's the sketch - it took me about 15 minutes to complete it.


It wasn't difficult. As always, I used helping dots and lines to map every object properly.

For the challenge I planned to go outside and draw but I didn't. I did take a picture. This is an alley in my neighborhood. I looked for a simple frame and that's what I found.


It might be a bit more complicated than the one in the lesson but, after all, it is a challenge!

So first - I mark my guiding dots and lines for basic items (3H pencil).
I actually erased a lot since it had plenty to do with perspective and I'm still not great at it. My challenge was not to be too detailed.


Obviously, a real learning is in these challenges. It took me way longer than 10 minutes to complete. I had to see. I had to think. I had to plan the sketch all by myself.

Here I added some details - made some actual lines, did some foliage and benches.


I didn't go too much into making it look realistic. What was important for me is too roughly show what there is. Although I am pleased with how the small palm trees came out.

The challenge sketch doesn't look good to me at all, but it's a challenge and it's supposed to be difficult.

It was the first time in years that I did an outdoor drawing. It was interesting and nice. I can't wait for more chances to draw outdoors.

I wish you a great day,
Dalia

August 12, 2013

Drawspace lesson F05 - How to draw and hatch a Manga male face

Hi all,

and welcome to Lesson F05 of a Drawspace art program.

Today we'll be drawing and hatching a manga male face named Cobrah. As always, after a relaxing practice in drawing lines there is a usual face drawing. Nice!

While reading the article I discovered that there's a ruler involved again. I don't know if it's actually good, since I want to do free-ruler drawings. I decided not to use it, although I'm sure it would make the final result better.

This is the first scheme. As suggested, I used an HB pencil to make it.


These are the basic features for the Cobrah face. This guy does look intimidating.


In this third sketch hair and eye lids were added. The sketch is more detailed now. 


This is the first Sharpie outline. I still avoided erasing the helping lines, although, as it seems, there's no way back at this point.

This is the final sketch. I erased the lines and finished the color fill in and the hatching.

I'm pretty happy with this drawing. My Cobrah face is a bit longer than the original one, but hey, that's what happens when you don't use a ruler.

I hope you found this lesson useful.

Tip of the day: Before I make any line I pit a dot on the paper. I make a mental measurement before a make a line.

Have a great day,
Dalia

August 10, 2013

DIY project: How to utilize the usage of your pencil box

Hi all.

As you probably already know, this blog is about drawing but not only. It's also about anything related to drawing, illustration and blogging. This is post gets in the DIY/Utilization category and I hope you'll find it interesting.


Ever since I started the Drawspace program I use pencils of different grade - from 6H to 8B. Which is nice. What's not so nice is that the way pencils are placed in their box makes it difficult for me to find the right pencil. What usually happens is that I take all my graded pencils out and look for the one I need. What a frustrating time waste!! So I've decided to do something about it.

It was obvious that I can't just put the pencils upside down with a sharpened part on a hard wooden surface. I had to find a solution to soften that surface.

After some thinking I've decided to use a piece of an old bathroom towel (note that any other soft and thick cloth will do the same great job).


At first I naturally thought about using some cotton wool but then I remembered all the pieces it tends to leave on the surface. So it was a no. Also the idea of some kind of sponge was not good either since you had to cut out an exact piece to make it fit the box bottom. Not worth the time waste as well.


So that's the way my box looks like now, and I love it!!! Not only I can see all the pencil grades but also I can see and reach all the tiny pencils that are usually hiding on the box's bottom. And it makes me love my DIY even more!


Conclusion: Utilization rules!!!

I hope you found this DIY useful.

Have a great day,
Dalia

August 08, 2013

Drawspace lesson F04 - How to work with graduated values in drawing.

Hello,

and welcome to Lesson F04 of a Drawspace art program. This lesson is about gradient shading using a hatching method. Lots of squares filled with pencil hatching. Some hair-like sketch. And a beautiful drawn dalmation that I could only dream to draw.

Anyways, this lesson is a pure drawing exercise. The sketches presented here are those required here.

The first two sketces were easy although the round one was more difficult. I believe I have to practice a bit, well, a lot more of the circle hand moement. I added this lesson to the future "Lessons to repeat" post.


This is it.

Have a great day,
Dalia


August 06, 2013

Drawspace lesson F03 - Different pencils, different values

Hello,

And welcome to Lesson F03 of a Drawspace art program.
This lesson is all about values. Well, pencil values, that is. It suggests to draw some mountains using all the possible pencil range there is.

The thing is that at this moment I don't have the whole spectrum of the possible pencils, and to tell you the truth, I don't intend to buy them all. I have most of them so I'll use what I have.

Also this lesson is about Atmospheric and Overlapping perspectives, meaning we'll be combining the two of them together.

At some point it was suggested in the lesson to use any of the learned shading method - Squirkling or Hatching. Since there's no challenge again, I decided to do both verisons.

The idea is simple - it's like "Drawing by numbers" method. I will be using my pencils on the marked area and then I'll use it again pressing harder on it.

This is the outline. I didn't add the numbers at first but I thought about the time I'd waste if I keep coming back to the sketch in the lesson all the time... So I added them. And saved myself some time.
After finishing the first plane - the farthest mountain I've realized that I made some mistake here. I made the outline using the HB pencil and so all the outlines are the same value, meaning no Atmospheric perspective in this sketch.
This is the sketch itself.


Like I said before, I've decided to do both Hatching and Squirkling shading, so this is the second sketch.


It was pretty easily done. It took some time, of course but I was patient and manage to finish both sketches.

So for Tip of the day would be this advice: When shading - be patient. It always takes time.

The one thing I didn't understand was the reason of drawing from bottom up, dark to light. Usually it's the other way around...

Also, how the hell people do the edges so smoothly? Experience only?

I wish you a great day,
Dalia

August 04, 2013

Drawspace lesson F02 - How to shade mountains using hatching techniques.

Hi all,

and welcome to Lesson F02 of a Drawspace art program. We're going back to draw the mountains we did in Lesson E03. In that lesson we were squirkling and this time well be hatching.

The sketch itself was a piece of cake to do, but the hatching was tricky. I might have drawn on a bigger scale than required but I had a real problem with keeping my hatching straight and long. How the hell do they do that?


After finishing and giving this sketch a second look, I've decided to do another one. The reason is that I didn't really like the way the grades turned out, so here it is.


It's not the best, but better than the previous. Still the making of long and straight hatches are a mystery to me.

If you guys have any idea/answer on the subject, do share here, I am intrigued :)

Have a great day,
Dalia