July 31, 2013

Does sharpening pencils make it a milestone?

Hi all,

I was sharpening my pencils last week and then it hit me! Every time I do that it makes it some kind of a small milestone. It becomes a fact that some work is being done. And isn't it for itself a signs that things are moving somewhere in the right direction? It might be a cliche thing to say, but hey, I'm proud of myself!


This is the first time I'm hooked so hard on something that makes me want to draw every single minute of the day. And at this moment I manage to do the very thing I'm committed to on my Mid season resolution - to post more often. I started in Jan with 2.5 posts a week and now I post 3-4 times a week, which is great!! I know, I know, it should be about quality and not quantity, but it's still important for me to work as fast as possible.

I wish you all a great week,
Dalia

July 29, 2013

Drawspace lesson E05 - How elipses work in perspective.

Hello all,

and welcome to a concluding, E05 lesson of Section E of the Drawspace art program.

This lesson is about drawing an Ellipse. Obviously, I am familiar with the concept of "2 ellipses + a rectangle = a cylinder", but the way the lessons author (mind, this is not Brenda H.) presented the subject made me read the article through. The lesson explains first and foremost how to draw a basic ellipse and afterwards it suggests two exercises for practice.

This is the first one - a sketch of a drinking cup. Simple enough and here it is. If you wonder why the hell my lines are not straight, that's because I usually don't use a ruler when I draw.


This is a second, and more complicated, exercise: a sketch of a cookie jar. More complicated than a simple cup, but still simple. Here it is. It's not as sharp as on the original drawing but, like I said, I don't use rulers.


As you can see I left all the guiding lines just outlining the sketch with a bolder pencil. Easier for me - more visible for you.

To conclude the section - it was the shortest and, for me, by far the easiest of all I did at this point. From what I understand, there's Perspective part 2, and probably part 3 as well. I keep on drawing.

Have a great day,
Dalia

P.S. This link will lead you to a great example of how perspective work with ellipses. Do check it out.

July 27, 2013

Drawspace lesson E04 - how to draw a 3dimential box using a One point perspective

Hi all,

This is an E04 lesson of a Drawspaceart program. This is a theoretical lesson about the basics of a One poin perspective with a 3d box drawing. Since I can draw such a box I won't even bother you with sketches and text.

Have a great day,
Dalia

July 25, 2013

Drawspace lesson E03 - How to create an Atmospheric perspective

Hello all,

and welcome to Lesson E03 of a Drawspace art program. This lesson we deal with an Atmospheric perspective (originally suggested by Leonardo DaVinci, if I'm not mistaken).
This lesson is quite simple: we draw three plane mountains, some trees and sky, squirkling the shading and try to create some perspective on the drawing.

I made this sketch in two stages. The first one had very light Squirkles. As I said before, my squirkls are too huge and too light; they don't cover the area properly. But for some reason I forgot to scan the drawing and now I only have stage 2 to show you.


I like it that there was another chance to practice the Squirkling method once more; it seems I'll have many other chances for the practice.

I had a great session, hope you did too.

Have a great day,
Dalia

July 23, 2013

Drawspae lesson E02 - How to do an overlapping effect with drawing.

Hello all,

and welcome to Lesson E02 of a Drawspace art program. This lesson is dealing with terms like Overlapping, Size Difference, Atmospheric Perspective and Arrangement. All these are to help us to create a 3dimential drawing.

We draw funny round wiggly faces and this is the sketch.


Nothing much to say, actually, 5 minutes of work. Although, it was nice to experiment with different facial expressions.

There was no challenge, so I've decided to leave it as is.

Have a great day,
Dalia

July 21, 2013

Drawspace Lesson E01 - Basic perspective for beginners

Hello all!

Welcome to Lesson E01 of a Drawspace art program. Today I start working on a new subject (of a new section) and it's perspective. This first lesson gives a theoretical knowledge about the nature of the Perspective drawing. It separates Geometric perspective from Atmospheric. This is a great theoretical lesson but there is no actual exercise. So I've decided to do some sketches based on those presented in the lesson: the squares, the bubbles and the blobs.

This is a basic Single Point Perspective exercise that every art student does at some point. I intentionally left all the helping lines so you could see the process. Also, as you can see that the lines are not ruler-straight. That's, well, because I didn't use any ruler.


This is a very cute bubble exercise. I think it already appeared in one of the Drawspace lessons because it seems strangely familiar to me. Anyways, here it is. I didn't want to spread the drawing on a whole paper sheet so I defined some edges on its area to make it more comfortable to work with. This one deals with perspective from the point of Overlaping, Size and Arrangement.


And this is the Blob exercise and it deals with an Atmospheric Perspective. The smaller and the blurrier the object - the farther it is. Shading still sucks but I'll deal with it in another lesson.


It was a nice lesson. I hope you enjoyed it.

Have a great day,
Dalia

July 19, 2013

Drawspace lesson D10 - ow to draw an Avocado skin

Hello all,

and welcome to Lesson D09 of a Drawspace art program. 

This is the last lesson of this section and obviously, most challenging. We draw an Avocado (and I love Avocado..). I've read the lesson prior to actual drawing and boy, it's gonna be difficult.

But let's begin.

First - we draw and overall shape. The definition of the shape is not by drawing a basic form as one usually does - an oval in this case - but squirkling your way around from the very beginning. Pencil 2H is in order.

This is the first step. I did the basic shape, making three layers of shading. At this point it's still easy.


Here I switched to pencil HB. The hardest part, as expected, was to create the illusion of bumps. These tiny crescents were tricky - I didn't really know how to place them and how much to press the pencil.
I finished with 4B pencil.


The sketch isn't perfect, but I like it.

After looking at my sketch I decided to make another one reffering to this image. It is obvious I could use a little more practice.

So this is the first step. I created a general shape trying to be as accurate as possible. First I will do the left - farther - avocado and then the right one.


This is the finished sketch. Again, not perfect, but it was a nice practice.


This is the last lesson of this section. After finishing it I've realised that the most difficult time for me was to create tiny squirkles. I tend to do them very big, even if I have to press hard on the pencil. I guess that that's another thing I have to work on. I guess I haven't yet realized how to properly build the bumpy texture itself.
I did like the idea of defining the form not by creating a basic contour, but by shading itself.

So yes, it was a really nice lesson.

I hope you liked it as much as I did.

Have a great day,
Dalia

July 16, 2013

Drawspace Lesson D08 - How to blend an image (drawing a Billy Blob Blended)

Hi all,

and welcome to Lesson D08 of a Drawspace art program.

Today's lesson is about blending values. The idea is simple. You create some different levels of shading and blend them using a tissue paper into a perfect smooth surface.
I am familiar with this technique. Like any other child I used to blend pencil shading with my own finger to make it smooth and perfect. And afterwards I usually cursed and ran into the bathroom to wash my forearm since it was up to elbow dirty. Don't get me wrong, I am not afraid of getting dirty but somehow this method never felt right to me. I don't know why. Maybe now it will feel different. We'll see.

Anyways, the task is simple. Draw an amorphyc figure. Squirkle your way from edges to center. Blend the shading. Repeat with a softer pencil. Blend again. Repeat and then draw the face of the character. The challenge - do several different forms.

But first - we practice and draw a rectangle.


When I started drawing the actual Blob, I first did a bit of a planning. I first found the actual "face" of a blob and only then began shading.


These two, which actually were part of the challenge exercise, made me thinking. I've realized that I am still waiting for the lesson that will explain the logics behind shadow placement. About how one decides on where the light source comes from and how exactly does it affect the drawn object. But I guess I should be patient and wait a little bit longer.


This is it for now. I hope you found this lesson asfun and useful as I did.

Have a great day,
Dalia

July 13, 2013

Drawspace: Lesson D06 - How to draw a Spruce tree

Hello,

and welcome to Lesson D06 of a Drawspace art program.

Today we will be drawing trees.

I'm really looking forward to this lesson, since I love nature and I love drawing trees and flowers. I actually dedicated a whole year to flowers drawing. But trees - that's another story. One of the problems that I always had this difficulty of creating this 3D illusions of a tree (or, let's be honest, everything else) - not only the left and right branches but also the front and back ones. So this is a good one.

These are the trees I can draw.


This is the kind of a Spruce tree I can draw.


And this is the Spruce branch I draw. I must say that for a very long time it was the only thing that I could draw and I actually liked it, so my notebooks were filled with those.


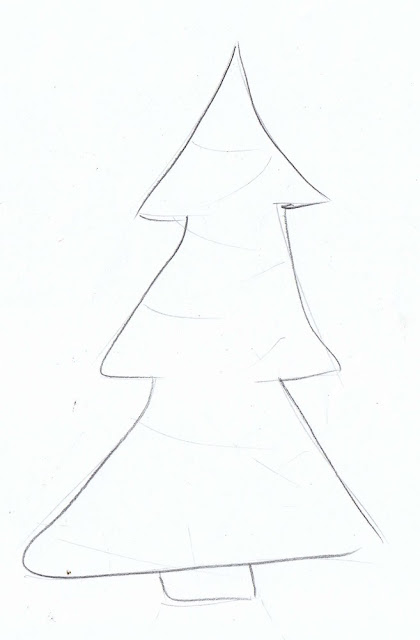
This is my first sketch. How could I gently say it? Now the best of my sketches.


There is a section in the lesson where Brenda talks about "less is more" if the tree is too sparse. And this is exactly my first outcome - a sparse Christmas tree!!! I would never bring home anything like it.

So I decided to do another one and there it is.


I've decided to change a method a bit. As you can see from this sketch I first built the skeleton of the tree. It's a trunk, of course and branches made of one line. If you look closer you could see the dots and the arrows where one branch turns to another. I thought I'd try and make it this way.

Here is another stage but even here, if you compare this one and the very first Spruce, the second try already looks way better.


And this is the final one.

Obviously, it's not perfect and I can't say I really like it so I'll put it in the "Lessons to repeat" list (yes, I really have such a list!).

I loved this lesson! It combined a Sqwirkling method I still needed to practice and a tree drawing.
Did you also find this lesson useful?

Have a great day,
Dalia

July 11, 2013

Drawspace: Lesson D05 - How to draw a curly baby (2)

Hello,

And welcome to Lesson D05 of a Drawspace art program.

This lesson is a nice one since here we get to draw 2 babies, I might say twins, a boy and a girl.

This sketch is the one before the final outlining. As you can see I used lots and lots helping lines (some of them are so light they're invisible), something that is not necessary required in the lesson itself. But it does help me. Keeps the proportions right.


When I was half way through the boy's shading, I wanted to give it up and draw the girl, but then I thought I was talking so much about learning how to shade properly, that I mustn't give up in the middle but to bring the shading to the end. But, wow, this is boring!!!


After finishing a sketch of the girl I was half way through the boy shading. I did feel stuck in this stage so I decided to move on to another lesson. After all, shading is important but not that much. Not at this point, at least.


Tip of the day: While Squirkling, remember to turn the pencil in your fingers for sharper lines. Also vary the size of your Squirkles to make a more natural shade.

I hope you enjoyed this lesson as much as I did.

Have a great day,
Dalia

July 09, 2013

Drawspace Lesson D04 - How to draw a curly baby

Hi all,

And welcome to Drawspace lesson B04.

This lesson suggests us to draw a cute curly baby and it was so easy that I won't even bother you with a process' details.

This is the sketch.


Hope it was easy for you too.

Have a great day,
Dalia

July 07, 2013

Drawspace lesson D03 - how to daw the Pupil of Iris.

Hi all,

Take a deep breath because in this lesson, B03, we are to draw a human eye. Exited? I know I am. There will be two sketches in all - one for a light color and one for a dark.
There are specific instruction for pencil usage every step of the way, so it shouldn't be difficult.

This is the third lesson, I believe that I'm actually using pencils of different values and when I began I started laughing. Maybe it's not that funny, but I've realized that my pencils - ranged from 2H to 6B - arranged perfectly in front of me. Why is it funny? Why is it funny? Because, as much as I try to be arranged and organized, I'm usually all over the place. But here they are, my five perfectly arrange pencils ready for me. Funny. And weird....

Anyway, this is the outline. As you can see, there are some lines I haven't erased, but I'll deal with them later.


And this is my step-by-step sketch.


It was my very first time drawing an eye. It's plain and basic at the moment but this is where you begin, I guess. After all, it is a program for beginners.

I'll see you soon.

Have a great day,
Dalia

July 05, 2013

Drawspace Lesson D02: Graduating squirkles

Hi all,

and welcome to Lesson D02 of a DrawSpace art program.

Just as I thought, this lesson is also dealing with a Squirkling shading method. As I finished reading the lesson, I thought to myself "yeaH, that's gonna be a good one" - why? No idea. I guess I do enjoy the practice and the process in general.

The task was to make Squirkled gradients in a 4 rectangle and in 2 squares.

When I started to plan my sketches I wondered weather should I make them small or large scaled, since there's a chance I'll have to deal with different sized objects in the future. So I decided to do both - there will be a single paged sketch with all the figures and a multi-paged sketch.

This is, obviously, a single page sketch. I found it pretty easily done, although, I did struggle a bit with Squares. Since it was a tiny and narrow figure, I found myself changing going from one pencil to another several times to make a perfect blend.
Also I was surprised to realize that it was not so difficult to blend from dark to light, since all my art teachers taught be to go from light to dark. Or am I wrong?


That's the larger scale. While drawing the big squares I did it up do bottom. It was pretty tempting to Squirkle left to right but I didn't in the end.


It was a fine lesson. I learned another method of shading, one I wasn't aware of before. In the future I plan to publish a collection of all shading methods I learned on this program, so it might as well be published next year.

Se you soon,
Dalia

July 03, 2013

Mid Year resolution: Plan - Do - Review

Hi all

It's June and 6 months of the year 2013 is behind us. It means that it is time to review the 2013 year's resolution and see what have been done so far.

This is the first time I ever do such a review, but since this blog is a "procrastination gateway and a self-commitment blog" - see the blog's header - I feel that this is the time and the place to do it.

So what do we have here?
  1. Sketch, sketch, sketch. As much as possible!!! - I do! I do!!!
  2. Learn to draw Chinese calendar characters - hmmmm....
  3. Finish the flower project this year. At this point I have 24 unpublished posts. I must finish them. It just doesn't feel right to leave it as it is - Not much action there at this moment :(But I do think about it all the time).
  4. Work on portraits and human figure sketches - I think I'll leave it for better times. 
  5. Be ready with a holiday illustration(s) at least one month in advance - No luck there at this point. A week is the best I did so far. But at least they're always done.
  6. Do Drawspace lessons weekly - Huge success here, two, sometimes tree lessons a week. And I'm sure I can do more. By now I'm in the middle of section D. I can't say that I'm really happy with the result, I wish I could draw and post more often, but hey, that's what is is at this point. But really should speed up otherwise it will take me several years to complete the free lessons program :). So from now on I'll be posting more often.
  7. Become a regular on Illustration Friday - I wish. I will.
  8. Learn to shade properly - working on it via Drawspace:)
  9. Learn to draw water properly.
  10. Do Animals drawing - did some, via Drawspace program (cartoons mostly).
  11. Follow all Shoo Rayner Youtube tuts (added 27.02.13).
  12. Learn more about Graphic Design (added 29.05.13) - unknowingly I do that for quit some time now. I'm reading and bookmarking lots and lots of articles and books and in a search for some nice online program that will help me to develop my skills. Any ideas?
Other things are in order:
  1. Keep developing my Graphiking gift shop. At the moment it stands on 345 items - No big change here.
  2. Keep blogging - at least once a week - Success here, blogging all the time!!! 
  3. Develop readership for this blog - working on it :)
  4. Do more SEO - working on it :)
I'm glad I did this review. It allowed me to look back and see the many things I forgot about. I know now where am I standing with my plans and what else I'm left to do. It brings the focus back. So for me one of the things that I should do is to finish the Flowers project from last year. I just cannot leave it as is.

I hope this post was useful for you.

Have a great day, 
Dalia