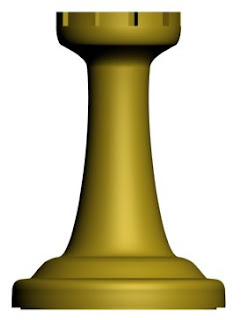
In this tutorial you will learn how to create a Chess Rook. This will be one of a Chess Set tutorials explaining how to create a Pawn , a rook, a knight and a chessboard itself.
As usual, you will need a reference image before you start creating anything. You can upload it here or find/create another one.
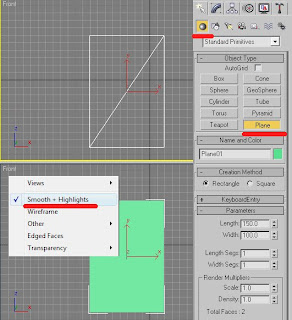
1. On a front view create a 150 x 100 plane. Then right-click the Front View and check Smooth and Highlight. This will allow you to create your pawn easily.

2. Press M and choose an empty slot. Go to Diffuse color, hit the grey square near it and choose a Bitmap to import the reference image. Apply the image to the Plane.
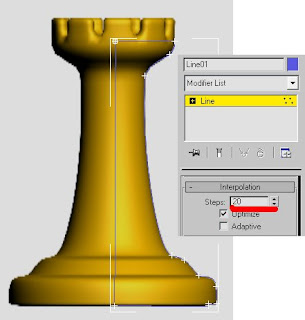
3. Of a front view outline only a half of the reference pawn using a Line tool. Close spline when you finish outlining. If the outline is not as accurate as it supposed to choose Vertexes in a Modifier menu and right click your mouse. Click Bezier Corners. Now you can adjust each corner handle separately. When finished outlining go to interpolation and change to 20 steps to make the line smoother. If you need to add some vertexes, press Refine and hit the line when little white cross appears above it.
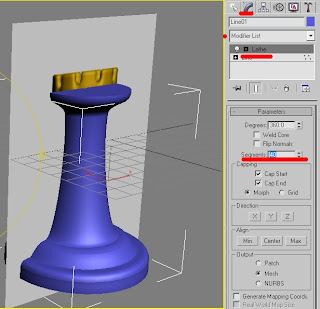
4. When you are pleased with the outline, go to the Modifier menu and choose a Lathe modifier. You will see that your outline became 3dimensional. In Parameters press Min button to set the pawn right. Change Segments to 40. Keep smoothing the corners, if needed.
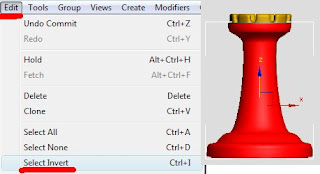
5. Now choose the object, right click it and convert to editable poly. Press F4 to see the wireframe, choose all polygons except the upper one's. Go to Edit + Select + Invert, to choose only upper polygons.
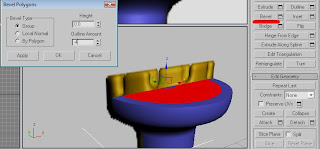
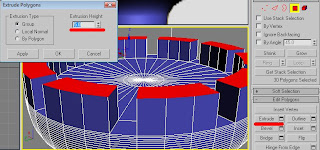
6. Go to Bevel and set its High to zero and outline to -4. Now choose polygons as shown on the image and extrude them – High 5.
7. Delete the reference plane.
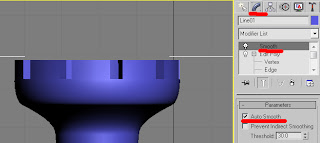
8. Choose Smooth in modifiers and check AutoSmooth.
9. Apply an ochre color to it (177, 148, 26) and hit F9 to render.
That’s it. The rock is ready
If you have any questions regarding this tutorial, do not hesitate to ask me.
How do you select all but the area at the top?
ReplyDeleteTo choose numerous sub-objects - polygon, segment or else - you should Click and Drag your mouse on the viewport.
ReplyDeleteAlso you should check the Selection Region Tool which is essential when it comes to sub-object selection.