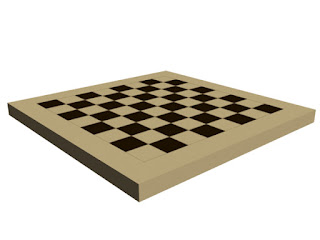
This time i will show you how to model a Chess Board.
The two things you must remember when creating a chess board is that it is square and that it divided to 8x8 colorful inside squares.
So …
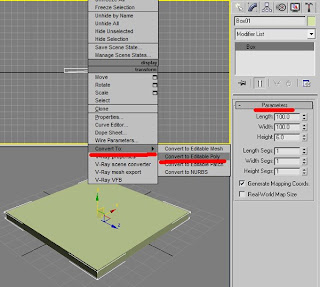
1. The first thing you want to do is to create a 100x100x6 box. Right-click any view and choose Editable poly. Go to Modifier list and choose Edge sub-object.
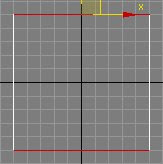
2. While standing on a Top view choose two opposite sides and Connect them (press the little square.
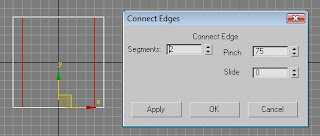
See image for parameters. Repeat this step with other opposite sides.
3. Press M and choose an empty slot. In a Material/Map browser choose a Multi/Sub-objects. This will allow us to use several colors on the same object. Choose Discard Old materials.
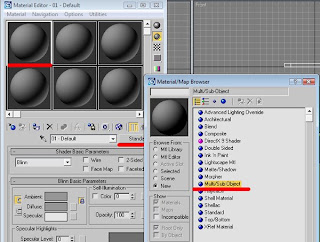
4. Since we will use only 2 colors, set the color number on 2. The first color will be a basic bright brown. I chose 254, 228, 171 for that matter.
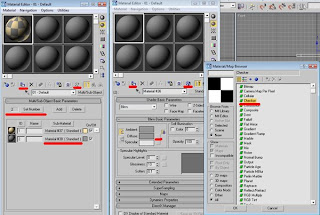
5. The other will represent a chess board itself with two colors – bright and dark one. Click the Material # button. Now click the Diffuse color button to choose a Checker material. Use 254, 228, 171 for bright and 40, 23, 0 for dark. Make it visible. Notice that each color has its ID number. Remember that so we could work with it later.
6. Apply the materials to our board.
Whatever happened with your colors it might not look the way it should be. But we'll fix it in aminute.
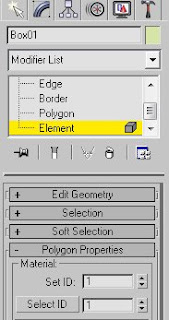
7. Choose the box, go to the Modifier list and choose Element sub-object. After it chooses the entire box go to polygon properties. Remember the Material ID's? It was 1 for bright and 2 for Checkers. Set the ID's to 1.
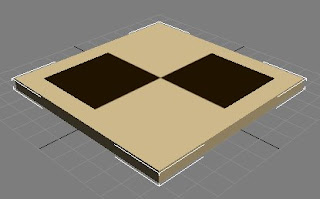
8. Now choose the upper polygon only and set ID's to 2. Now you see your materials how they should be. Almost.
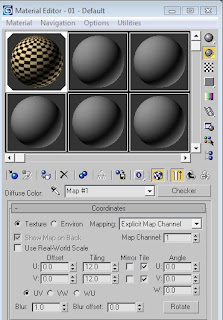
9. Go back to the Checker material and set the Tiling number to 12. You will see the changes immediately.

10. Change the background to white (8) and hit F9 to render.
That’s it.
If you have any question regarding this tutorial, don’t hesitate to ask me.
Hi,
ReplyDeleteLike the basic appraoch of modeling and texturing . Looking for more intermediate tutorials.
Regards,
Cakewalkcg
-------------------------
For Free video tutorials and free models please visit www.cakewalkcg.com